Thanksgiving DIY Table Centerpieces
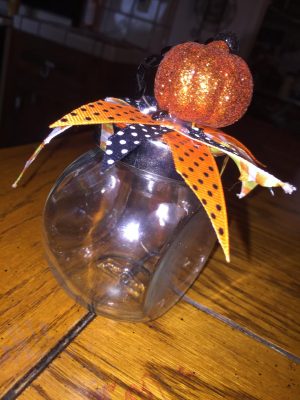
Pumpkin centerpiece
To design a simple DIY jar centerpiece with ribbons you will need:
- One, (or as many as you need) glass, or plastic translucent jar (MUST HAVE SOME TYPE OF LID)
- Any kind, shape, size ribbons with any intricate design on the ribbon pieces that you want
- And finally any (pumpkin suggested) ornament piece for the top of the lid on the jars
- Scissors
- Hot glue gun (Tape, or glue if a hot glue gun is not available)
- To begin with you will need to cut your ribbons into 3-4 inches.
- At the edge of each ribbon, make sure you cut a piece of ribbon off, make sure you cut diagonally.
- On each ribbon apply a very small amount of glue on each strand and place them in the middle of the lid, and make sure each ribbon is secured to the base ribbon, which will be attached to the lid (You can also coat your ribbon in glitter).
- After the application of ribbons you will need to wait until the glue is dry, then take any kind of ornament of your choosing and glue it on top of the ribbons, and you may add any or as many more smaller ornaments on your lid.
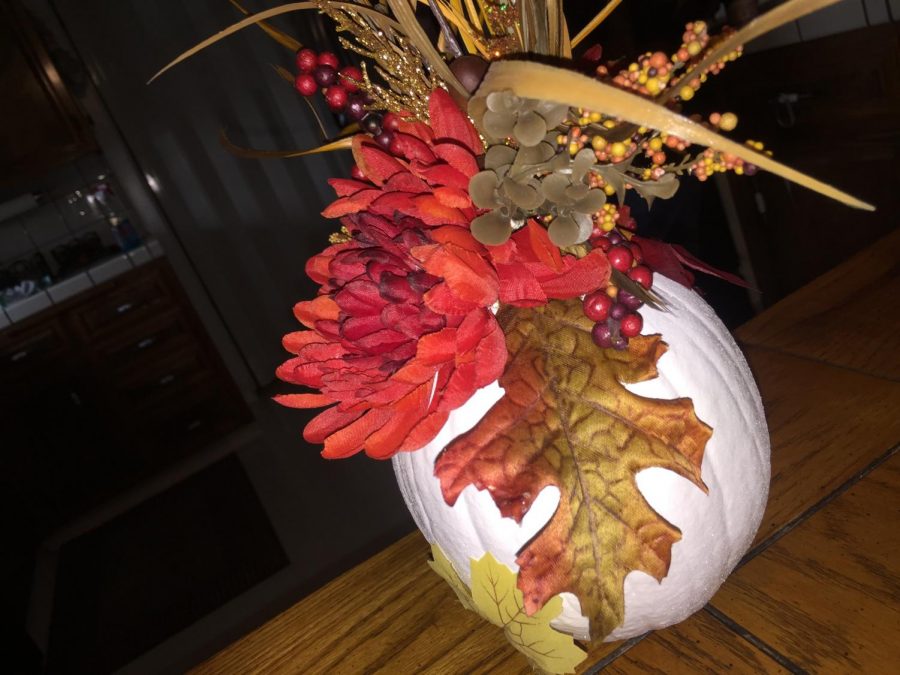
To design a simple DIY pumpkin with false (or real) leaves, a dinner centerpiece, you will need:
- White (or any color of choosing) paint
- Hot glue gun (Or super glue)
- False flowers, leaves, straw, and red berries
- Any sized pumpkin
- Paint brush (A large paint brush suggested)
– To start you will coat the pumpkin in any of the paint that you chose, make sure you do more than one coat, around 3-4 is suggested.
– After you have let your pumpkin sit and dry, you can begin using your hot glue gun (or superglue) and begin placing your false leaves, flowers, straw, and red berries accordingly to the way you wish to place the decorations.
– If you use real leaves, make sure they are not too brittle and won’t fall off of the pumpkin.